We will now create the iconic blinky.
Let’s access the project with cd exercises/blinky. We will need to edit the file main.rs.
On esp32-c6 board there is no regular LED connected, instead there is an addressable LED which works differently and is beyond the scope of this book.
Instead, we will use a regular LED and a resistor, and build a circuit controlled with the GPIO pin headers.
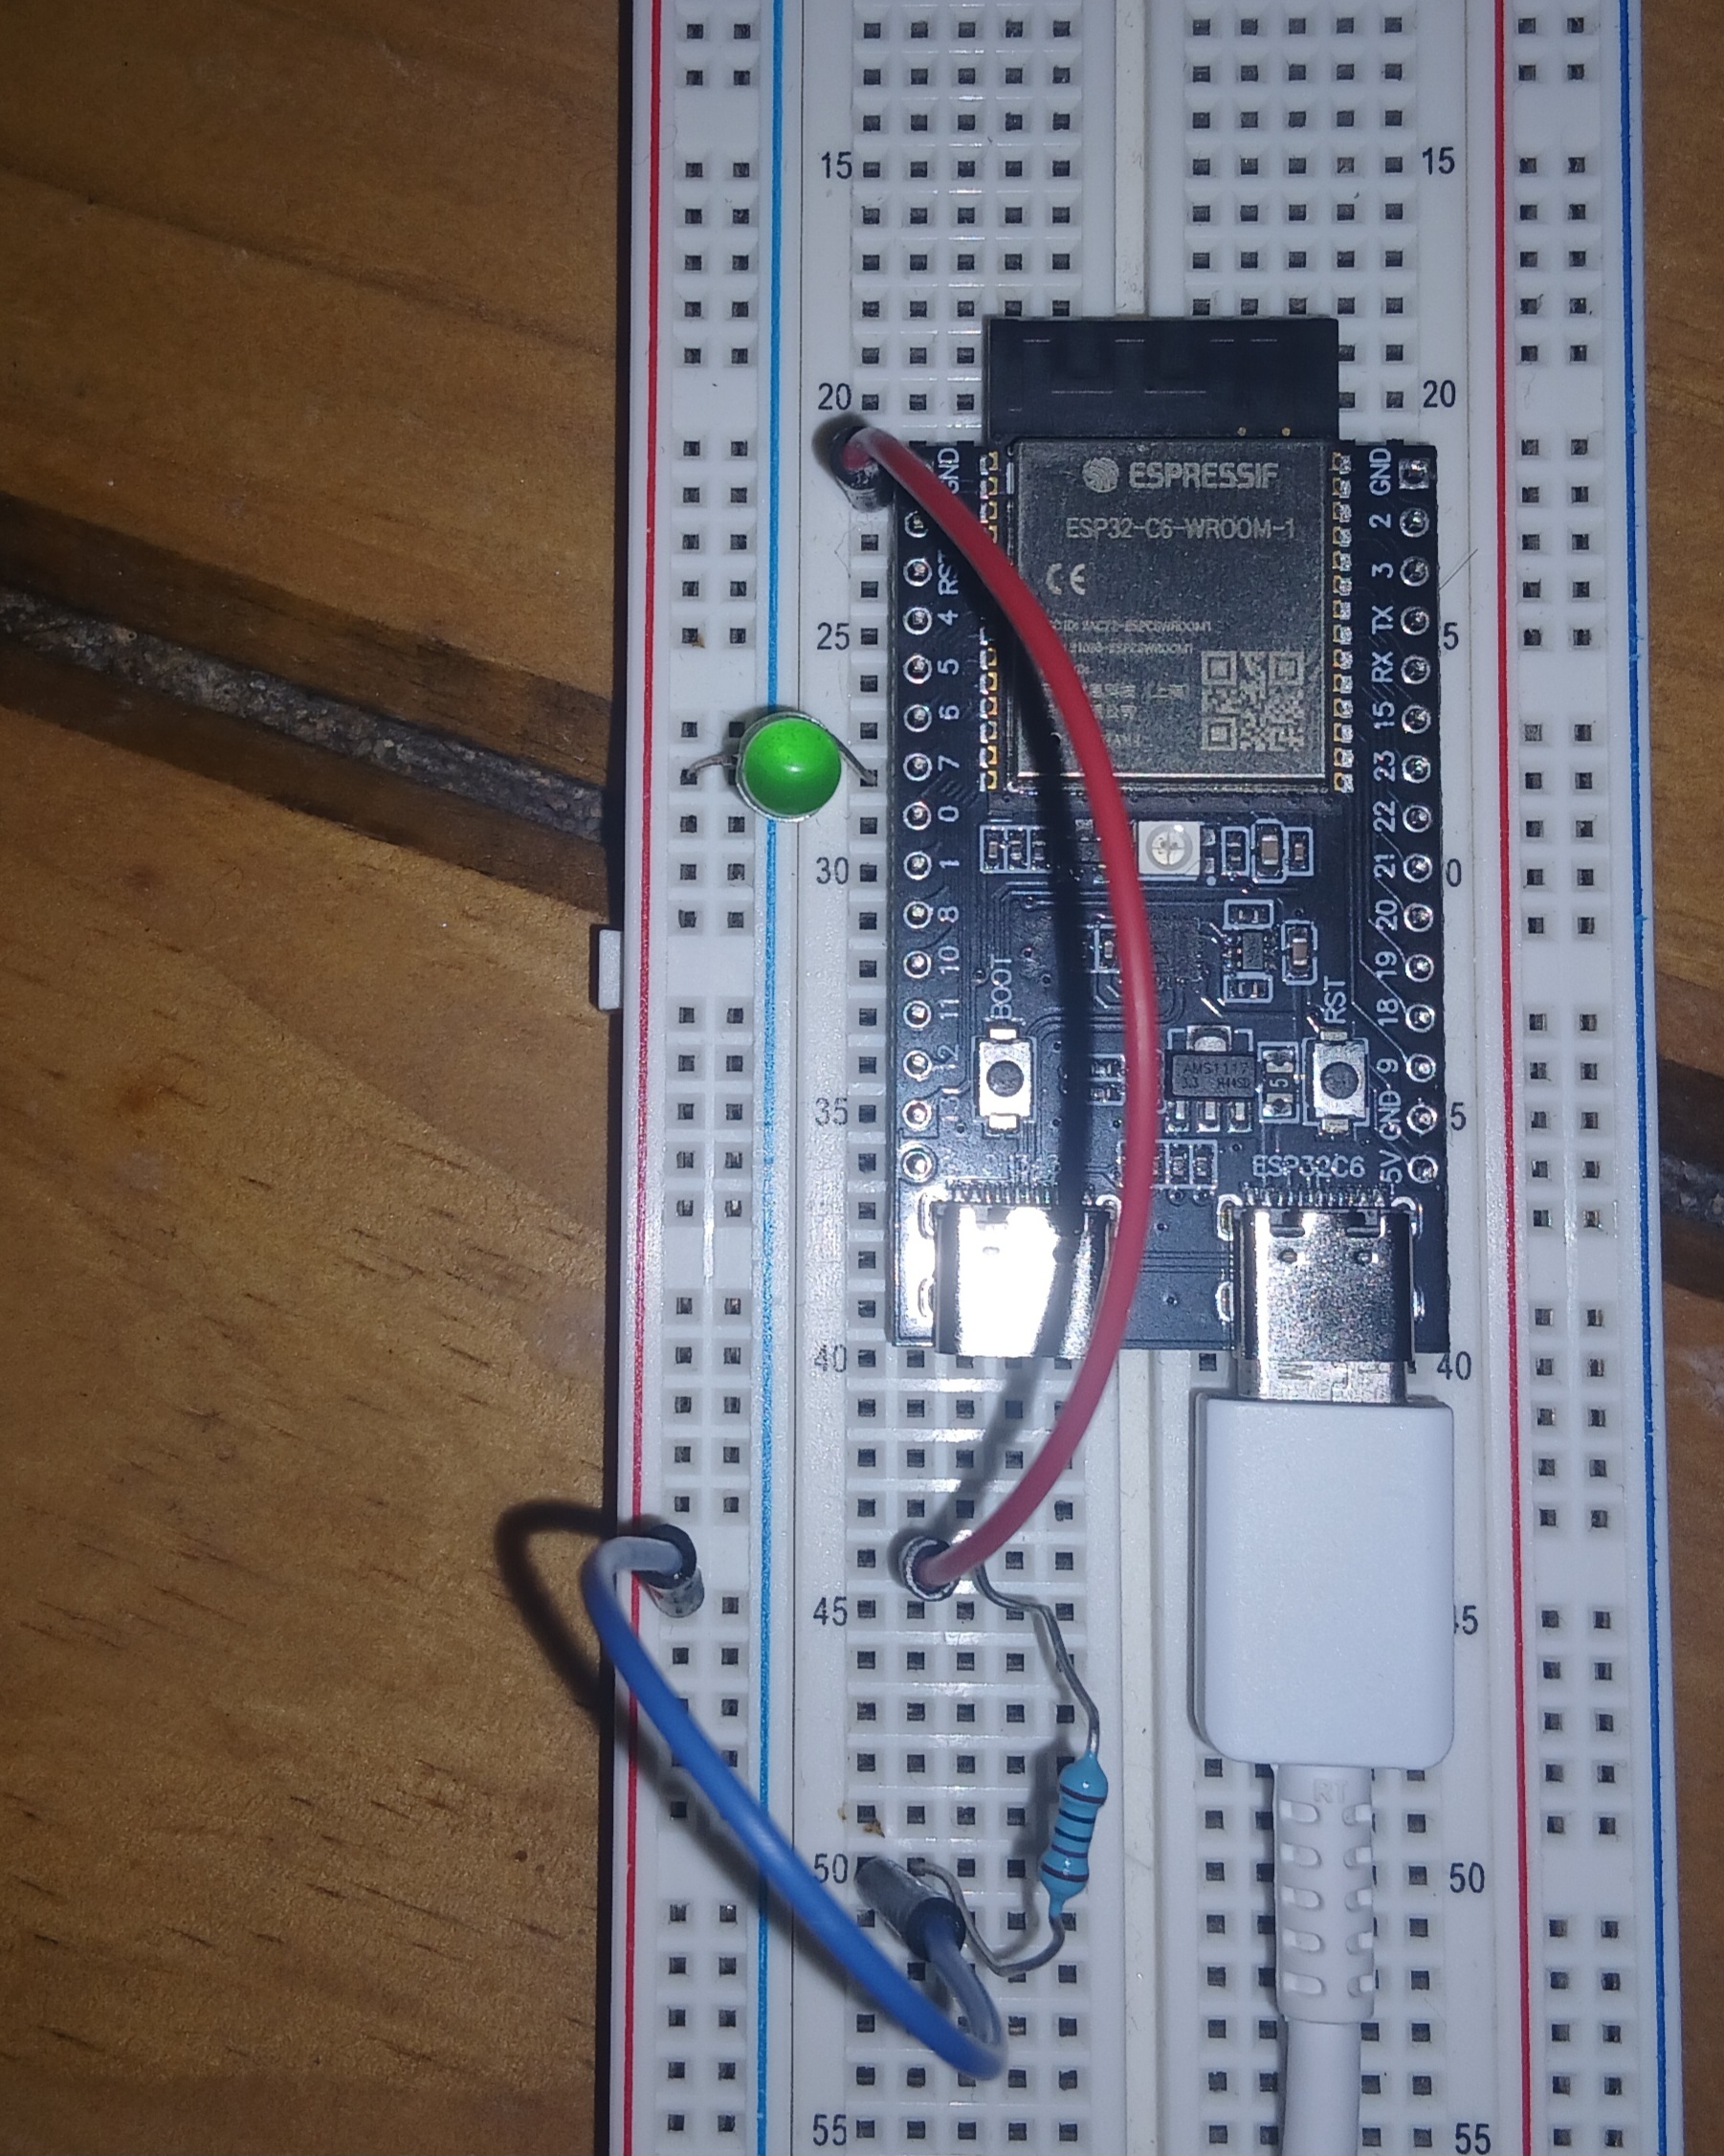
esp32-c6, wiring the LED
Wire up the board as shown on the previous image:
-
Start wiring from
GNDpin header (red wire), -
From there to the resistor (220mΩ or otherwise, without it the LED blows up.)
-
From the other leg of the resistor to the LED (blue wire),
-
Finally, the LED connects to GPIO7 (the long LED-leg is on GPIO7.)
Exercise
- Create
OutputConfigwith default configuration.- Hint: it implements
Default.
- Hint: it implements
- Toggle the
ledwith 3500ms delay.
The exercises/blinky/examples/blinky.rs contains a solution.
You can run it with the following command cargo run --example blinky --release.